2-1. Upper/Lower Limit Setup
Be sure to complete the Upper/Lower Limit Setup for your blind. This is the process of teaching the blind "how far up and how far down it should go." Only after this setup will it move precisely to the position you want (%), and will saved positions (M1–M3) and alarms work correctly.
After registration, the guide screen below appears. Tap [No, I'll set it up!] to start right away.
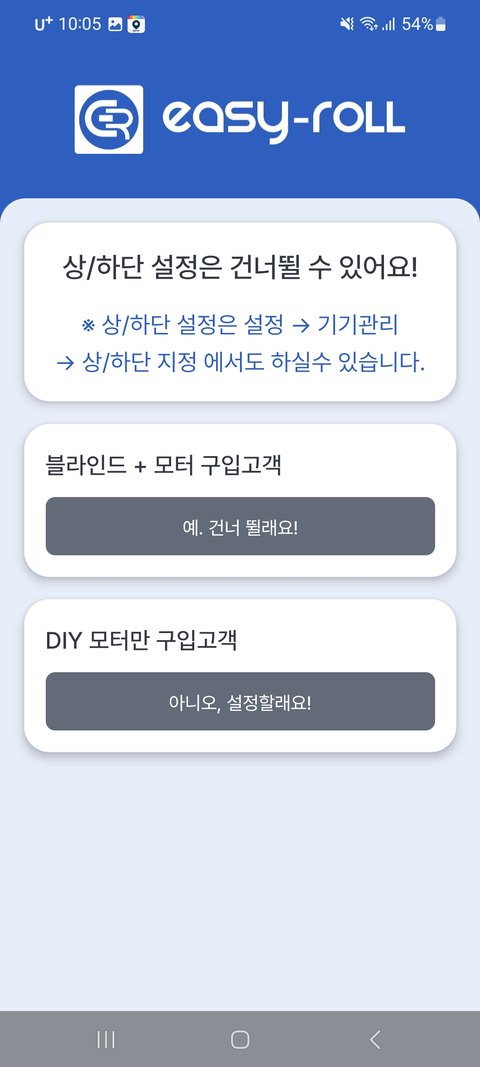
Please read before you start
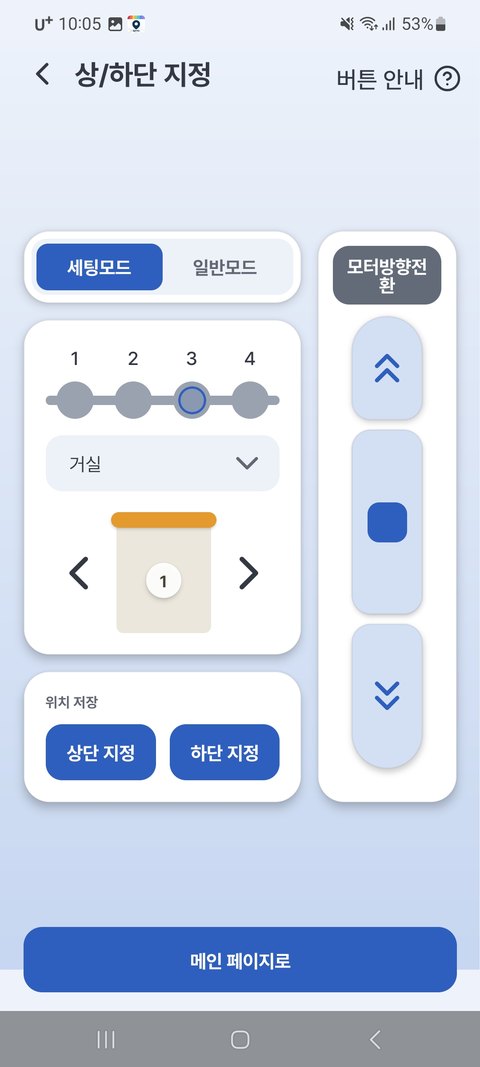
In Setup Mode, the blind moves without any limit stops. Be sure to press ■ Stop before it reaches the end. If it keeps winding, the blind can be damaged, so please make sure you understand the steps below before proceeding.
Setup Steps
- Before setup, lower the blind all the way down and then raise it back up.
- In Setup Mode, move the blind to your desired "topmost" position → [Set Upper]
- Then move it to your desired "bottommost" position → [Set Lower]
- ⚠️ Always set the upper first, then the lower!
- If you have several blinds, use ◀ ▶ to switch between devices and repeat.
Good to know
- To set it up later — tap the ⚙ next to the zone name → [Zone Device Settings] → [Upper/Lower Limit Setup]
- If the direction is reversed — you can change it with [Motor Direction] on the screen.
- If you re-set the upper limit — the lower limit and saved positions are automatically adjusted along with it. No need to set everything again.