DIY Motor Unit Assembly
This is the process of attaching the motor unit to the blind's head rail. All you need is a Phillips screwdriver.
Please Read Before Assembly & Installation
Pre-Installation Checklist
- First roll the blind all the way up, then begin assembly.
- By default, viewed from inside the room, the motor is assembled on the right side of the blind.
- If you install it on the left side, after assembly you must go to the app's Upper/Lower Limit Setup page and press the [Motor Direction] button to change the motor direction. (See 2-1. Upper/Lower Position Setup.)
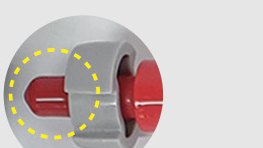
- Do not remove the cap on the motor unit shown in the photo below. Assemble it with the cap left in place.
- Have ready the QR code card included with each motor. (Not applicable to EasyRoll Lite.)
- If you are installing two or more blinds, it helps to write each blind's location or number (name) on its card so the QR code cards don't get mixed up!
- It is the same as the QR code attached to the lower right of the motor unit.
Assembly Steps
Tap a photo to view it larger.
1. Loosen the screw on the head rail's side cap. (※ The default is right-side assembly — for left-side installation, see the checklist above.)
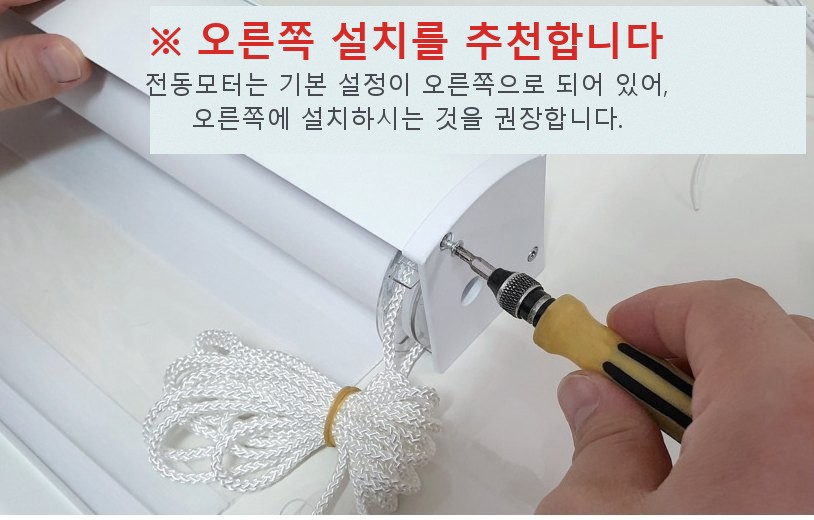
2. Open the side cap and lay the head rail down on the floor.
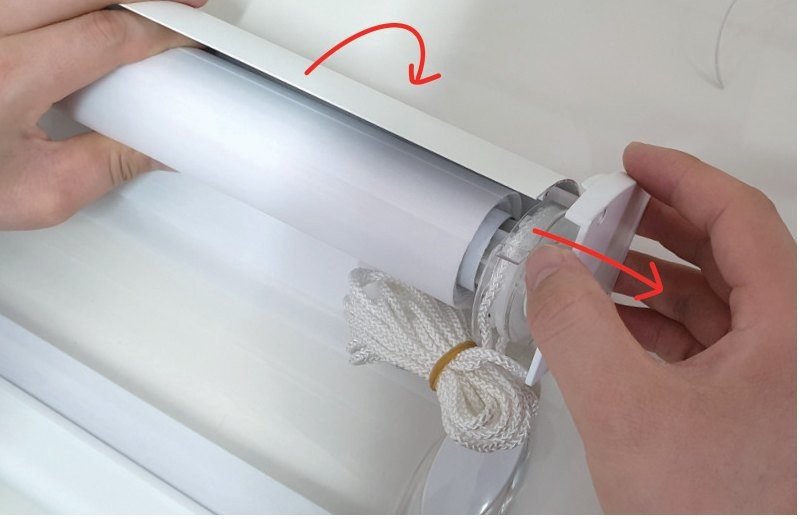
3. Remove the blind cord.
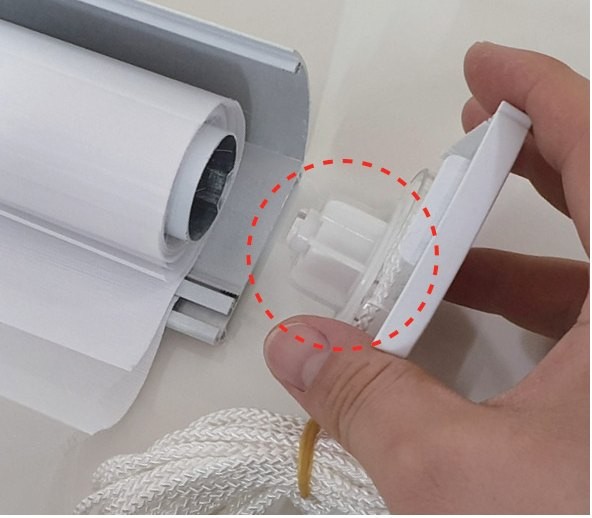
4. Fit the head rail's side cap into the grooved slot on the side of the motor unit.
※ If there is play because the size doesn't quite fit: add a 'bushing' first, then attach the motor unit.
Select the tab that matches your type of head rail:
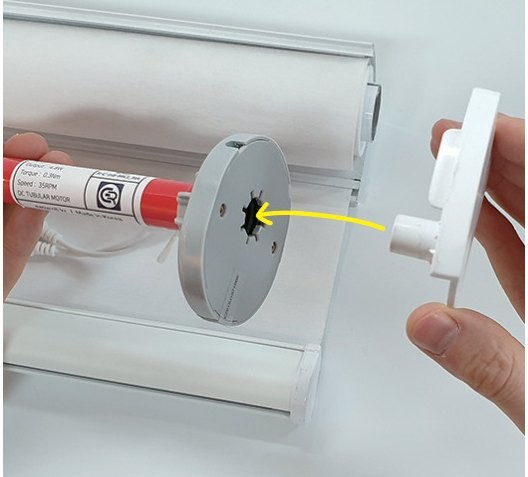
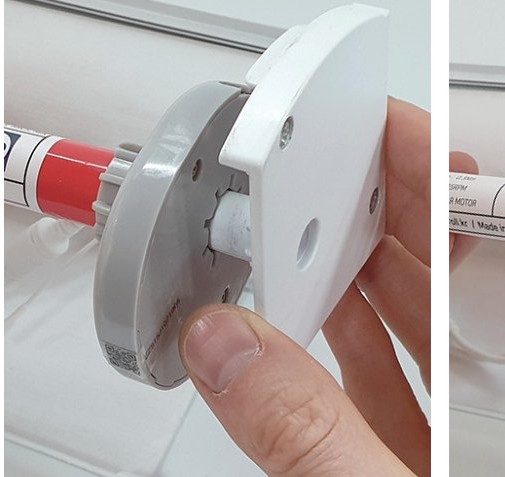
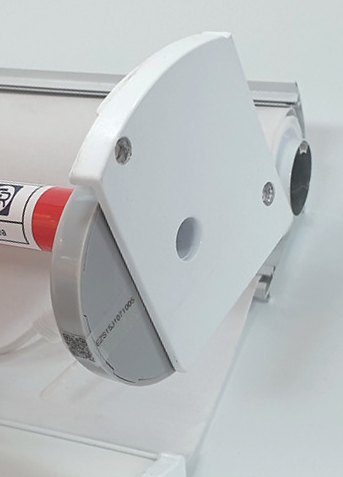
Box-Type · Adding a Bushing When There's Play
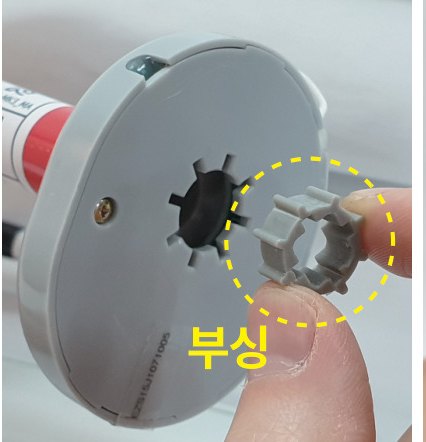
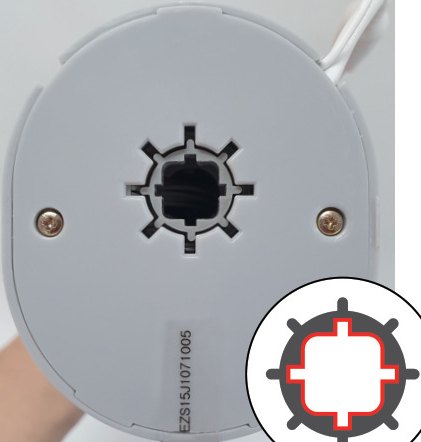
+ Insert the bushing so it forms a plus (+) shape.
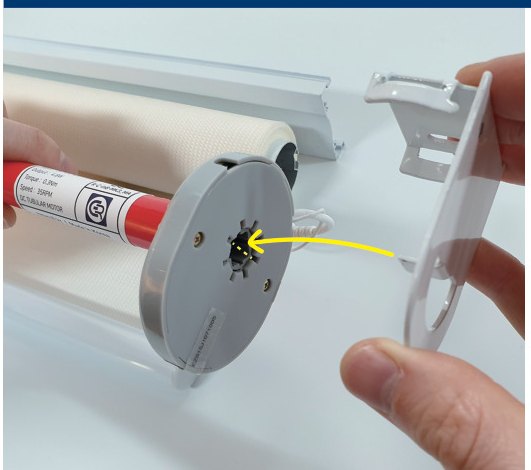
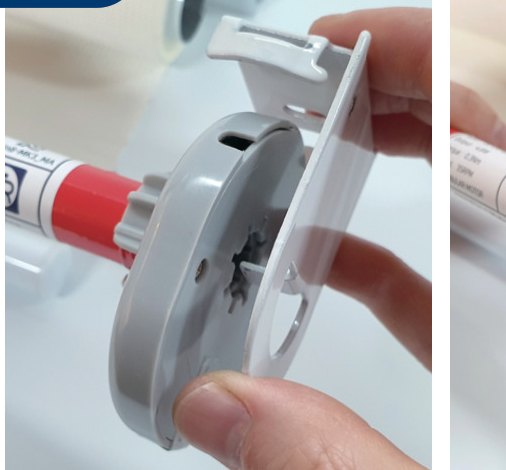
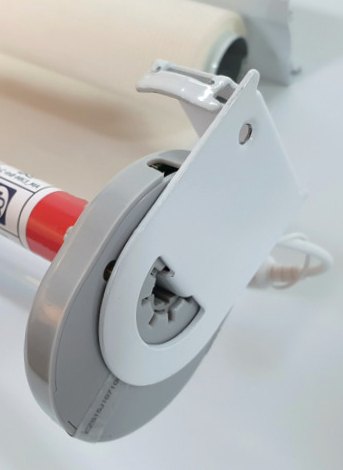
Open-Type · Adding a Bushing When There's Play
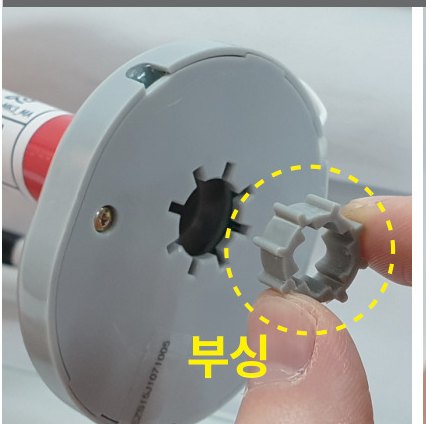
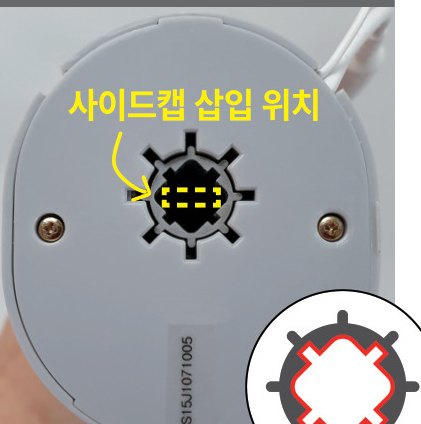
✕ Insert the bushing at the side cap insertion point so it forms a cross (✕) shape.
5. First, check the shape of your blind's pipe.
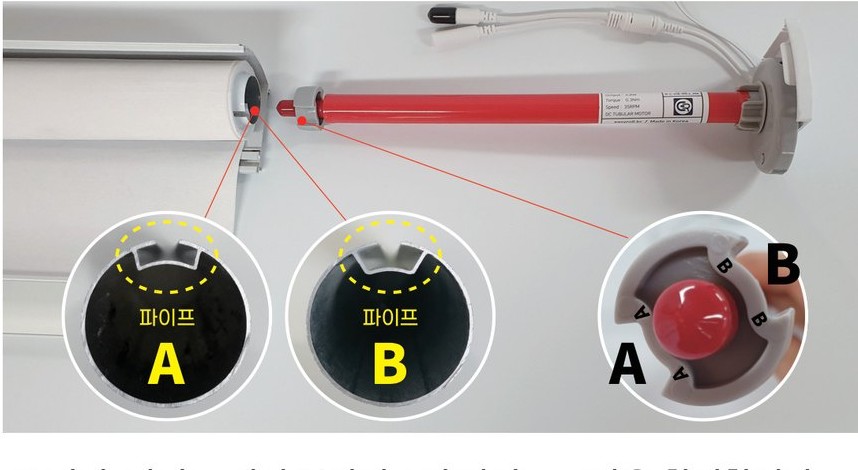
- Pipe Type A → position A on the motor unit
- Pipe Type B → position B on the motor unit
※ A/B is marked on the motor unit.
6. Turn the pipe you identified to match position A/B on the motor unit, then push the motor unit into the pipe. (※ Do not remove the motor's cap! Insert it with the cap left in place.)
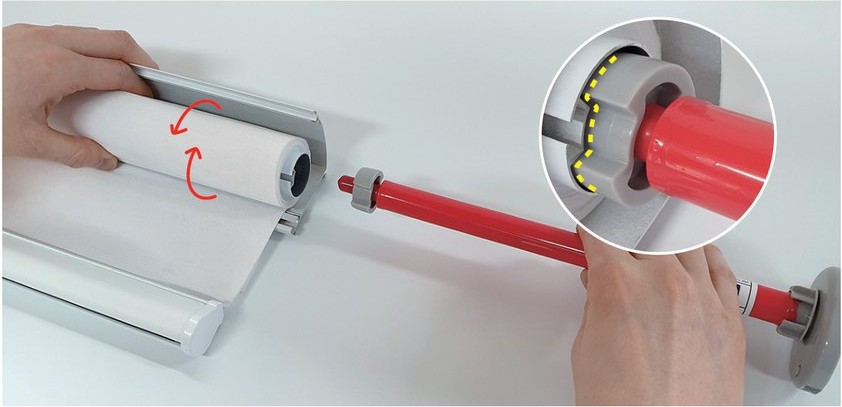
7. Fit the idler into the pipe too, matching its shape (turning it as you go).
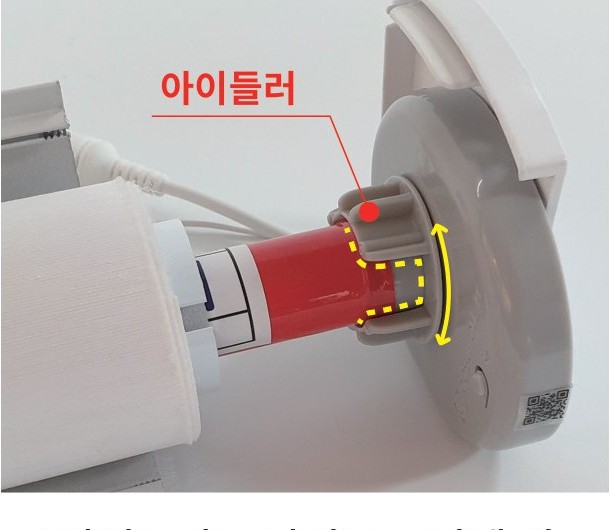
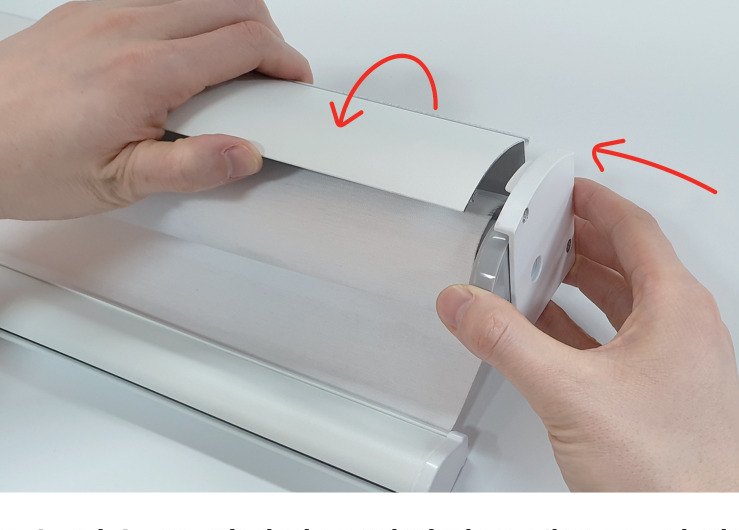
8. Stand the head rail you laid down back into position and close the side cap.
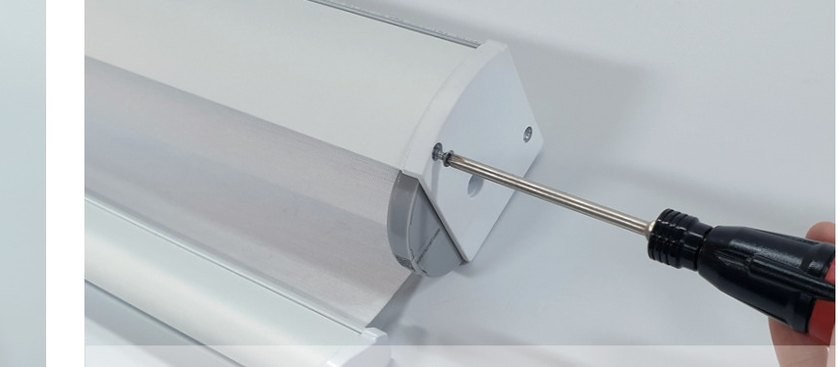
9. Fasten it with the screw. — Motor assembly complete! (※ Don't over-tighten the screw! It causes the motor to slow down.)
Install the blind only after you have also checked the power connection below.
※ Be sure to plug the adapter (power plug) into the outlet only after all installation is complete.
How to Connect the Power
Select the tab that matches the number of blinds you are installing.
Connection Layout
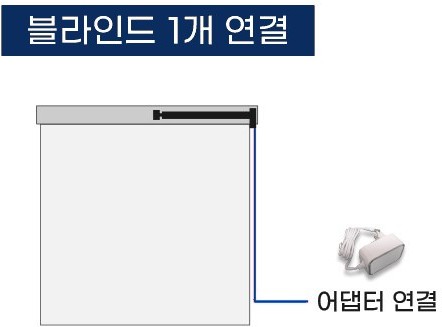
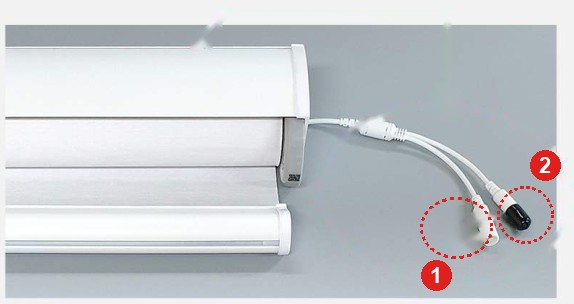
- Connect the adapter to ①.
- Route ② up onto the head rail or fix it as far away from the blind fabric as possible. (※ Do not remove the protective cap!)
- If it touches the fabric, static electricity builds up and causes malfunctions.
Connection Layout
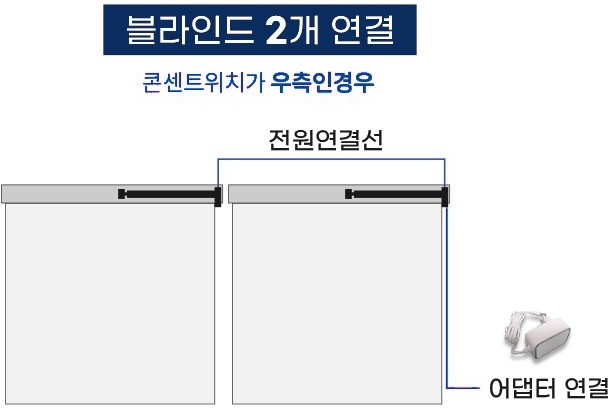
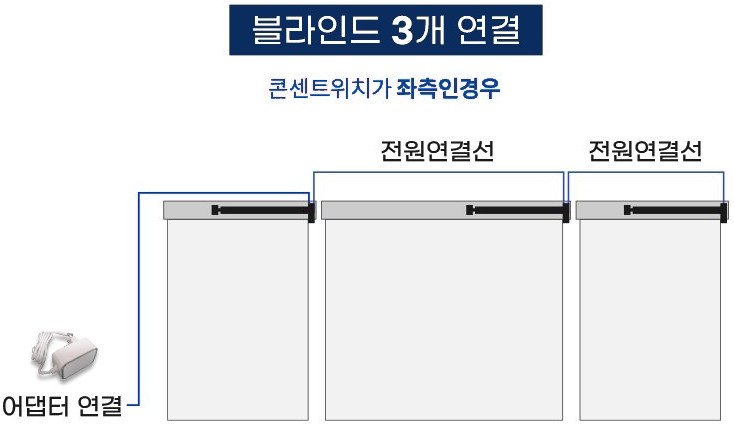
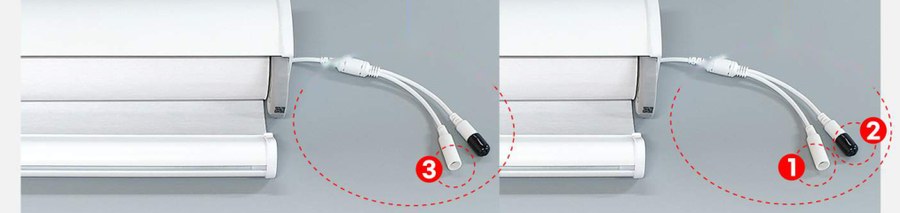
- Connect the adapter to ①. (※ Connect it to the blind nearest the outlet.)
- Remove the protective cap on ② and connect the power connection cable to ② and ③. (※ Do not remove the one protective cap that remains after connecting!)
- Route the connection points up onto the head rail or fix them as far away from the blind fabric as possible.
- If they touch the fabric, static electricity builds up and causes malfunctions.
Outlet Position · Cable Management
- The outlet can be on either the left or the right side. Just connect the adapter to the motor unit nearest the outlet.
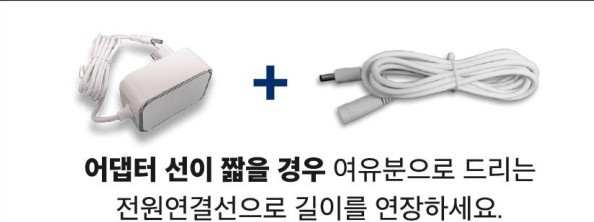
- The adapter comes in a standard 1.2 m length, and you can extend it with a power connection cable.
- A 5 m power connection cable comes in the basic package that contains the adapter, and a 3 m cable comes with each additional motor.
- Manage the cables by routing them up above the head rail or toward the back!
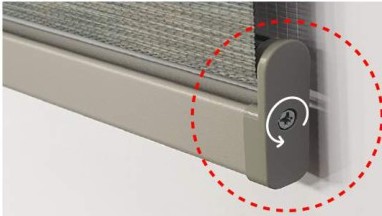
For a combi blind, only loosen the screw fixed to the bottom bar slightly! If it is too tight, the tube can't rotate, which causes static electricity and malfunctions.
After installing the blind, you must register the product in the mobile app for it to work!
Once installation is finished, continue from 1-2. Installing the App & Signing Up.